 Generally, we spend more of our waking hours at work than anywhere else. Working from home and not having that “water cooler” to escape to has a downside. I call it sitting on your butt for way too long. There have been times where my butt would honestly go numb from sitting at my 9+ hours a day job. I tried many things to combat this problem. I put alerts on my calendar, I set alarms on my Fitbit, I scheduled meetings to walk - nothing worked until I tried a stand-up desk.
I was on work travel and happened to score an office with a sit/stand desk. I cannot tell you how refreshing it was to have the option to stand. It made my entire body feel so much different. After that, I knew I had to have a standing desk but there are a lot of options out there. Desks are expensive! You can buy a dual motor desk, crank handle desk, and then there’s the cardboard box stacking method. Standing up while working helps to increase concentration and scientifically it also burns more calories. I’ve found when I’m in a work stump, standing helps spur creativity and if paired with music, makes for great dance breaks!
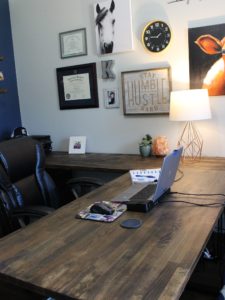
For my home office I really wanted a large flat space to work from. To get exactly what I wanted for a lower price point, I ended up making my desk. Before you gasp, it was seriously easy, and you can do it too. I cannot tell you how many people have asked me to make one for them. Trust me guys/gals, its easy. Here’s how I did it:
- Choose the size, type, and design. I have a large home office and wanted an L-shaped desk. I wanted a dark stain (to match the floor) with a butcher block wood top. I wanted it to give the rustic, farmhouse feel to match my décor.
- Research the desktop. Butcher block wood is hard to find and very expensive. I found a great alternative at Ikea. Ikea sells kitchen countertops that look just like butcherblock in multiple lengths. When you buy the wood for your desk, make sure you pay attention to what it’s coated with (if anything). For mine, I purchased natural wood because I wanted to stain it. Here are the links to the countertops I purchased:
- Main desktop- Ikea’s Gerton Tabletop, color: beech, size: 61x29 1/2
- Long, side desktop- Ikeas’s Karlby Countertop, color: birch, size: 98x1 1/2 "
- Main desktop- Ikea’s Gerton Tabletop, color: beech, size: 61x29 1/2
- Research the legs. For my long side desk, I wanted normal legs. Something easy and, inexpensive I could just screw on. I decided to go with these simple hairpin legs which I purchased from Amazon. Of course I wanted my main desk to raise and lower, so I found a really cool start-up company out of NY called Autonomous. They had really good reviews and sold a DIY kit – it even included all the hardware (and instructions) I needed.
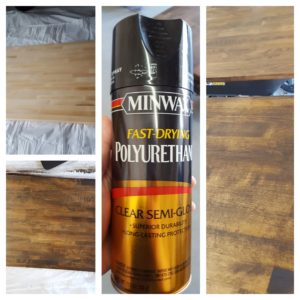
- Decide on the stain. This was the easy part of me. I wanted to match my floors which are dark brown, so I choose Minwax wood stain in Jacobean. It’s a nice mix of black and brown. For protectant post-stain, I used Minwax fast-drying polyurethane clear semi-gloss in a spray application.
- Purchase supplies & assemble your desk.Get the supplies. I purchased from Amazon, Ikea, Autonomous, and Home Depot the following items:
-
- Desktops & legs (Ikea, Autonomous & Amazon)
- Sandpaper (and/or electric sander) both in heavy grit and light
- Cheesecloth
- Sawhorse or other area for you to put your desktop on
- Plastic gloves
- Drop cloth or plastic
- Rags (or paintbrush)
- Screw driver
- Measuring tape
- Pencil
- Can of stain (color of your choice)
- Protectant (oil or polyurethane)
-
- Prep the wood. Both of my desks had a layer of oil on them. For the stain to soak in, you must make sure you have unfinished wood. I had to sand off the oil before staining it. I used an electric sander to get it done faster.

- Stain. Make sure that the wood is free of all debris before you stain it. I used a cheesecloth to wipe the wood thoroughly. I then laid down a plastic sheet on the floor to protect from any spills. I wore plastic gloves and used a rag to apply the stain. You can use a paintbrush, but I preferred the rag since it was easier and faster. Make sure you apply evenly it in the same direction as the wood. I let the first coat sit on the wood for 3-4 minutes and then removed the excess. I then repeated that process and did a second coat.
- Protect. If your desk is going to be heavily used, I highly suggest you add a layer of protectant. You can use an oil or polyurethane. I sprayed two very light coats of Minwax fast-drying polyurethane clear semi-gloss. It was easy to apply (in a spray can) and dried really fast. I choose semi-gloss because I didn’t want it to be super shiny.
- Add the legs. Attach the legs or standing desk unit to the bottom of your desktop. Make sure to measure the location of the screws evenly. I used an electric screwdriver and measuring tape to do so.
- Enjoy!